Installing in Air-Gapped RHEL Environments
This guide provides a comprehensive procedure for deploying Capacity Private Cloud in an air-gapped (offline) Red Hat Enterprise Linux (RHEL) environment. Air-gapped networks have no external internet access, so all software packages, container images, and model files must be staged on an internet-connected machine and then transferred to the isolated server. The guide covers the full workflow: staging assets online, transferring them offline, installing all infrastructure components, deploying the platform via Helm, and verifying the installation.
While the procedure is compatible with other Linux distributions, the examples below are based on RHEL 9.5.
Scope of Installation
This procedure covers the offline installation of the following components:
- Runtimes and Orchestration: Docker, Containerd, and Kubernetes
- Networking and Service Mesh: Calico, Linkerd, and Ingress-nginx
- Package Management: Helm
- Infrastructure Services: Docker Private Registry and External Services (MongoDB, PostgreSQL, RabbitMQ, and Redis)
- Platform Stack: Capacity Private Cloud, MRCP-API, and MRCP-Client
Environment Requirements
The procedure uses a two-server approach:
- Online Server: A Linux system connected to the internet, used to download and stage all required assets.
- Offline Server: A secured Linux system with no external network access where the production environment is installed.
Example server information:
Online Server: rhel-online at 172.18.2.75
Offline Server: rhel-offline at 172.18.2.76
Ensure that curl and rsync are installed on both servers before proceeding.
Online Server Preparation
System Prerequisites
Kubernetes requires specific system settings to manage container networking and memory efficiently.
Disable Swap Space
sudo swapoff -a
sudo sed -i '/swap/ s/^\(.*\)$/#\1/g' /etc/fstab
Configure Kernel Modules
The following modules are required for the Kubernetes pod network (Calico) to function correctly.
sudo tee /etc/modules-load.d/k8s.conf <<EOF
ip_tables
overlay
br_netfilter
EOF

sudo modprobe ip_tables
sudo modprobe overlay
sudo modprobe br_netfilter
Network and Security Settings
Adjust the system's network filtering and disable the firewall to allow inter-pod communication within the cluster.
# Enable bridged traffic and IP forwarding
sudo tee /etc/sysctl.d/k8s.conf <<EOF
net.bridge.bridge-nf-call-ip6tables = 1
net.bridge.bridge-nf-call-iptables = 1
net.ipv4.ip_forward = 1
EOF

# Apply sysctl settings without reboot
sudo sysctl --system

# Disable firewall and set SELinux to permissive
sudo systemctl stop firewalld
sudo systemctl disable firewalld
sudo setenforce 0
sudo sed -i 's/^SELINUX=enforcing$/SELINUX=permissive/' /etc/selinux/config
Online Asset Staging
Docker and Containerd
Create a staging directory and download all Docker packages and dependencies.
mkdir /lumenvox && cd /lumenvox
mkdir docker-offline && cd docker-offline

# Add Docker repository
sudo dnf config-manager --add-repo https://download.docker.com/linux/rhel/docker-ce.repo

# Install Docker
sudo dnf install docker-ce docker-ce-cli containerd.io docker-buildx-plugin docker-compose-plugin

# Start and enable Docker
sudo systemctl enable --now docker
sudo usermod -aG docker $USER
newgrp docker

# Download all packages and dependencies for offline transfer
sudo dnf download --resolve --alldeps \
  docker-ce \
  docker-ce-cli \
  containerd.io \
  docker-buildx-plugin \
  docker-compose-plugin
Kubernetes
Point the package manager to the official Kubernetes community repository. This configuration targets v1.31. Replace v1.31 in the URL if you require a different version.
cat <<EOF | sudo tee /etc/yum.repos.d/kubernetes.repo
[kubernetes]
name=Kubernetes
baseurl=https://pkgs.k8s.io/core:/stable:/v1.31/rpm/
enabled=1
gpgcheck=1
gpgkey=https://pkgs.k8s.io/core:/stable:/v1.31/rpm/repodata/repomd.xml.key
EOF
Download Kubernetes RPMs and Dependencies
mkdir -p /lumenvox/k8s-offline && cd /lumenvox/k8s-offline

sudo dnf install --downloadonly --downloaddir=. \
  kubeadm kubelet kubectl cri-tools socat conntrack ebtables ethtool
Download the required Kubernetes v1.33 container images and save them as .tar archives.
Note: To identify the required images for your version, run kubeadm config images list on a running Kubernetes system.
mkdir -p /lumenvox/k8s-images && cd /lumenvox/k8s-images

docker pull registry.k8s.io/kube-apiserver:v1.31.14
docker save registry.k8s.io/kube-apiserver:v1.31.14 > kube-apiserver:v1.31.14.tar

docker pull registry.k8s.io/kube-controller-manager:v1.31.14
docker save registry.k8s.io/kube-controller-manager:v1.31.14 > kube-controller-manager:v1.31.14.tar

docker pull registry.k8s.io/kube-scheduler:v1.31.14
docker save registry.k8s.io/kube-scheduler:v1.31.14 > kube-scheduler:v1.31.14.tar

docker pull registry.k8s.io/kube-proxy:v1.31.14
docker save registry.k8s.io/kube-proxy:v1.31.14 > kube-proxy:v1.31.14.tar

docker pull registry.k8s.io/coredns/coredns:v1.11.3
docker save registry.k8s.io/coredns/coredns:v1.11.3 > coredns:v1.11.3.tar

docker pull registry.k8s.io/pause:3.10
docker save registry.k8s.io/pause:3.10 > pause:3.10.tar

docker pull registry.k8s.io/etcd:3.5.24-0
docker save registry.k8s.io/etcd:3.5.24-0 > etcd:3.5.24-0.tar
Calico
mkdir -p /lumenvox/calico-offline && cd /lumenvox/calico-offline

# Download the installation manifest
curl -O https://raw.githubusercontent.com/projectcalico/calico/v3.27.0/manifests/calico.yaml

# List required images
grep image: calico.yaml | awk '{print $2}' | sort -u

# Pull and save images
docker pull docker.io/calico/cni:v3.27.0
docker save calico/cni:v3.27.0 > cni:v3.27.0.tar

docker pull docker.io/calico/kube-controllers:v3.27.0
docker save calico/kube-controllers:v3.27.0 > kube-controllers:v3.27.0.tar

docker pull docker.io/calico/node:v3.27.0
docker save calico/node:v3.27.0 > node:v3.27.0.tar
Crictl
mkdir -p /lumenvox/crictl-offline && cd /lumenvox/crictl-offline
curl -LO https://github.com/kubernetes-sigs/cri-tools/releases/download/v1.31.0/crictl-v1.31.0-linux-amd64.tar.gz
sudo tar zxvf crictl-v1.31.0-linux-amd64.tar.gz -C /usr/local/bin
Linkerd
mkdir -p /lumenvox/linkerd-offline && cd /lumenvox/linkerd-offline
curl -O https://assets.lumenvox.com/kubeadm/linkerd.tar
tar -xvf linkerd.tar
Helm
mkdir -p /lumenvox/helm-offline && cd /lumenvox/helm-offline
curl -O https://get.helm.sh/helm-v3.19.2-linux-amd64.tar.gz
tar -zxvf helm-v3.19.2-linux-amd64.tar.gz
sudo mv linux-amd64/helm /usr/local/bin/helm
Add the Helm repository and download the charts.
helm repo add lumenvox https://lumenvox.github.io/helm-charts
helm repo update
helm fetch lumenvox/lumenvox --untar
Edit the lumenvox/values.yaml file to point to the private Docker registry and set the image tag. The tag must match the tag used when images were pushed to the private registry. In this example, we are installing v6.3, so the tag is :6.3.
cd /lumenvox/helm-offline/lumenvox
vi values.yaml
Set the repository value to my-docker-registry.com:5000.
Download the values.yaml from GitHub.
cd /lumenvox
curl -O https://raw.githubusercontent.com/lumenvox/containers-quick-start/master/values.yaml
Platform Images and External Services
The following shell script pulls and saves all platform v6.3 images and the external service images. Save the script as download_lv_images.sh and execute it. The images will be saved to a single compressed archive.
#!/bin/bash

IMAGES=(
  "lumenvox/lumenvox-api:6.3"
  "lumenvox/session:6.3"
  "lumenvox/reporting-api:6.3"
  "lumenvox/archive:6.3"
  "lumenvox/deployment-portal:6.3"
  "lumenvox/admin-portal:6.3"
  "lumenvox/neural-tts:6.3"
  "lumenvox/license:6.3"
  "lumenvox/vad:6.3"
  "lumenvox/cloud-init-tools:6.3"
  "lumenvox/configuration:6.3"
  "lumenvox/storage:6.3"
  "lumenvox/grammar:6.3"
  "lumenvox/itn:6.3"
  "lumenvox/management-api:6.3"
  "lumenvox/deployment:6.3"
  "lumenvox/asr:6.3"
  "lumenvox/resource:6.3"
  "lumenvox/cloud-logging-sidecar:6.3"
  "lumenvox/mrcp-api:6.3"
  "lumenvox/simple_mrcp_client:latest"
  "lumenvox/diag-tools:jammy-4.2.0"
  "lumenvox/license-reporter-tool:latest"
  "docker.io/rabbitmq:4.1.1"
  "docker.io/redis:8.0.3"
  "docker.io/mongo:8.0.17"
  "docker.io/postgres:17.4-alpine3.21"
)

SAVE_DIR="/lumenvox/lv_images-offline"
mkdir -p "$SAVE_DIR"

for IMAGE in "${IMAGES[@]}"; do
  echo "----------------------------------------"
  echo "Processing: $IMAGE"

  if docker pull "$IMAGE"; then
    # Sanitize filename: replace / and : with _
    FILE_NAME=$(echo "$IMAGE" | tr '/:' '_')

    echo "Saving to $SAVE_DIR/${FILE_NAME}.tar"
    docker save -o "$SAVE_DIR/${FILE_NAME}.tar" "$IMAGE"
  else
    echo "ERROR: Failed to pull $IMAGE. Skipping..."
  fi
done

echo "----------------------------------------"
echo "Compressing all images into one bundle..."
tar czvf lv_images-offline.tar.gz -C /lumenvox lv_images-offline

echo "Done! Final bundle: lv_images-offline.tar.gz"
The following shell script downloads the ASR, TTS, and ITN model files. Save the script as download_lv_models.sh and execute it. The files will be saved to /lumenvox/lv_models-offline.
#!/bin/bash

# Directory to save files
DOWNLOAD_DIR="/lumenvox/lv_models-offline"
mkdir -p "$DOWNLOAD_DIR"

# List of URLs to download
URLS=(
  "https://assets.lumenvox.com/model-files/asr/asr_encoder_model_en.manifest"
  "https://assets.lumenvox.com/model-files/asr/asr_decoder_model_en_us.manifest"
  "https://assets.lumenvox.com/model-files/asr/asr_decoder_model_en_gb.manifest"
  "https://assets.lumenvox.com/model-files/asr/asr_lang_model_en_us.manifest"
  "https://assets.lumenvox.com/model-files/asr/asr_lib_model_en_us.manifest"
  "https://assets.lumenvox.com/model-files/asr/multilingual_confidence_model.manifest"
  "https://assets.lumenvox.com/model-files/asr/dist_package_model_asr.manifest"
  "https://assets.lumenvox.com/model-files/tts/tts_base_lang_data.manifest"
  "https://assets.lumenvox.com/model-files/dnn/backend_dnn_model_p.manifest"
  "https://assets.lumenvox.com/model-files/dnn/dist_package_model_en.manifest"
  "https://assets.lumenvox.com/model-files/neural_tts/neural_tts_en_us_megan-4.0.0.manifest"
  "https://assets.lumenvox.com/model-files/neural_tts/dist_package_model_neural_tts.manifest"
  "https://assets.lumenvox.com/model-files/itn/itn_dnn_model_en.manifest"
  "https://assets.lumenvox.com/model-files/asr/4.1.0/multilingual_confidence_model-4.1.0.tar.gz"
  "https://assets.lumenvox.com/model-files/tts/tts_base_lang_data.tar.gz"
  "https://assets.lumenvox.com/model-files/dnn/1.0.0/backend_dnn_model_p-1.0.0.tar.gz"
  "https://assets.lumenvox.com/model-files/asr/asr_lang_model_en_us.tar.gz"
  "https://assets.lumenvox.com/model-files/asr/4.1.1/asr_encoder_model_en-4.1.1.tar.gz"
  "https://assets.lumenvox.com/model-files/neural_tts/4.0.0/neural_tts_en_us_megan-4.0.0.tar.gz"
  "https://assets.lumenvox.com/model-files/asr/4.1.0/asr_decoder_model_en_us-4.1.0.tar.gz"
  "https://assets.lumenvox.com/model-files/asr/4.1.0/asr_decoder_model_en_gb-4.1.0.tar.gz"
  "https://assets.lumenvox.com/model-files/neural_tts/2.0.0/dist_package_model_neural_tts-2.0.0.tar.gz"
  "https://assets.lumenvox.com/model-files/asr/4.2.0/dist_package_model_asr-4.2.0.tar.gz"
  "https://assets.lumenvox.com/model-files/dnn/1.0.3/dist_package_model_en-1.0.3.tar.gz"
  "https://assets.lumenvox.com/model-files/asr/1.0.0/asr_lib_model_en_us-1.0.0.tar.gz"
  "https://assets.lumenvox.com/model-files/itn/3.0.1/itn_dnn_model_en-3.0.1.tar.gz"
)

# Download each file
for URL in "${URLS[@]}"; do
  FILE_NAME=$(basename "$URL")
  echo "Downloading $FILE_NAME..."
  curl -fLo "${DOWNLOAD_DIR}/${FILE_NAME}" "$URL" || echo "Failed to download $URL"
done

echo "All downloads attempted. Files are in: $DOWNLOAD_DIR"
Media Server and External Services
mkdir -p /lumenvox/services-offline && cd /lumenvox/services-offline
git clone https://github.com/lumenvox/mrcp-api.git
git clone https://github.com/lumenvox/mrcp-client.git
git clone https://github.com/lumenvox/external-services.git
cd external-services
curl -O https://raw.githubusercontent.com/lumenvox/external-services/master/docker-compose.yaml
curl -O https://raw.githubusercontent.com/lumenvox/external-services/master/rabbitmq.conf
curl -O https://raw.githubusercontent.com/lumenvox/external-services/master/.env
Ingress-nginx
mkdir -p /lumenvox/ingress-nginx-offline && cd /lumenvox/ingress-nginx-offline
helm repo add ingress-nginx https://kubernetes.github.io/ingress-nginx
helm fetch ingress-nginx/ingress-nginx --untar

docker pull registry.k8s.io/ingress-nginx/controller:v1.12.4
docker save registry.k8s.io/ingress-nginx/controller:v1.12.4 > controller:v1.12.4.tar

docker pull registry.k8s.io/ingress-nginx/kube-webhook-certgen:v1.5.2
docker save registry.k8s.io/ingress-nginx/kube-webhook-certgen:v1.5.2 > kube-webhook-certgen:v1.5.2.tar
Docker Private Registry
A Docker private registry is a container image server that your organization controls. Instead of pulling images from a public service like Docker Hub, you store them in your own registry, allowing only authorized systems to access them. This registry will be used to serve images to the offline server.
cd /lumenvox/docker-offline
docker pull registry:2
docker save registry:2 -o registry.tar
mkdir -p registry/data
Create a docker-compose.yaml file to map port 5000 and persist images in the ./data folder.
sudo tee /lumenvox/docker-offline/registry/docker-compose.yaml<<EOF
services:
  registry:
    image: registry:2
    container_name: private-registry
    ports:
      - "5000:5000"
    volumes:
      - ./data:/var/lib/registry
    restart: always
EOF
Start the Docker registry.
docker compose up -dConfigure Docker to allow pushing to the insecure (HTTP) private registry. Add the following to /etc/docker/daemon.json (create the file if it does not exist). Replace the hostname and port with your private registry values.
sudo tee /etc/docker/daemon.json <<EOF
{
  "insecure-registries" : ["my-docker-registry.com:5000"]
}
EOF
sudo systemctl daemon-reload
sudo systemctl restart dockerAdd a host entry for the private registry. Replace 172.18.2.75 with the actual IP address of the online server.
172.18.2.75 my-docker-registry.comTag and push the ingress-nginx images to the local registry.
cd /lumenvox/ingress-nginx-offline

docker tag registry.k8s.io/ingress-nginx/controller:v1.12.4 my-docker-registry.com:5000/controller:v1.12.4
docker push my-docker-registry.com:5000/controller:v1.12.4

docker tag registry.k8s.io/ingress-nginx/kube-webhook-certgen:v1.5.2 my-docker-registry.com:5000/kube-webhook-certgen:v1.5.2
docker push my-docker-registry.com:5000/kube-webhook-certgen:v1.5.2
Confirm the images are in the private registry.
curl my-docker-registry.com:5000/v2/_catalog
The following shell script tags and pushes all platform and external service images to the local registry. Save the script as load_push_local_registry.sh and execute it from /lumenvox.
#!/bin/bash

# Registry config
REGISTRY="my-docker-registry.com:5000"
IMAGE_DIR="/lumenvox/lv_images-offline"

# Ensure the registry string doesn't end with a slash for clean concatenation
REGISTRY="${REGISTRY%/}"

for TAR in "$IMAGE_DIR"/*.tar; do
    echo "----------------------------------------------------------"
    echo "Processing $TAR..."

    # Capture the full name:tag from the docker load output
    IMAGE_FULL_NAME=$(docker load -i "$TAR" | awk '/Loaded image:/ { print $3 }')

    if [ -z "$IMAGE_FULL_NAME" ]; then
        echo "Error: Failed to extract image name from $TAR"
        continue
    fi

    echo "Found image: $IMAGE_FULL_NAME"

    # 1. Remove 'docker.io/' prefix if it exists
    CLEAN_NAME="${IMAGE_FULL_NAME#docker.io/}"
    # 2. Remove 'lumenvox/' prefix if it exists
    # This turns 'lumenvox/mrcp-api:6.3' into 'mrcp-api:6.3'
    CLEAN_NAME="${CLEAN_NAME#lumenvox/}"

    TARGET_IMAGE="${REGISTRY}/${CLEAN_NAME}"

    echo "Tagging as: $TARGET_IMAGE"
    docker tag "$IMAGE_FULL_NAME" "$TARGET_IMAGE"

    echo "Pushing: $TARGET_IMAGE"
    docker push "$TARGET_IMAGE"
done

echo "----------------------------------------------------------"
echo "Done."
Verify the registry contents.
curl my-docker-registry.com:5000/v2/_catalog
Offline Server Preparation
System Prerequisites
Apply the same system prerequisites on the offline server as the online server.
Disable Swap Space
sudo swapoff -a
sudo sed -i '/swap/ s/^\(.*\)$/#\1/g' /etc/fstab
Configure Kernel Modules
sudo tee /etc/modules-load.d/k8s.conf <<EOF
ip_tables
overlay
br_netfilter
EOF

sudo modprobe ip_tables
sudo modprobe overlay
sudo modprobe br_netfilter
Network and Security Settings
# Enable bridged traffic and IP forwarding
sudo tee /etc/sysctl.d/k8s.conf <<EOF
net.bridge.bridge-nf-call-ip6tables = 1
net.bridge.bridge-nf-call-iptables = 1
net.ipv4.ip_forward = 1
EOF

sudo sysctl --system

# Disable firewall and set SELinux to permissive
sudo systemctl stop firewalld
sudo systemctl disable firewalld
sudo setenforce 0
sudo sed -i 's/^SELINUX=enforcing$/SELINUX=permissive/' /etc/selinux/config
Configure Host File
Add entries for the offline server and the private Docker registry on the online server.
sudo vi /etc/hosts
172.18.2.76 rhel-offline
172.18.2.75 my-docker-registry.com
Copy Staging Files from Online Server to Offline Server
Use rsync to copy all staging directories from the online server. An alternative is to use scp.
sudo mkdir /lumenvox
rsync -avzP user@remote_host:/path/to/remote/folder /path/to/local/destination/Install Docker and Containerd
cd /lumenvox/docker-offline
sudo dnf install *.rpm --disablerepo=* --skip-broken
sudo systemctl enable --now docker
sudo systemctl enable --now containerd
Configure Containerd for Private Registry
containerd config default | sudo tee /etc/containerd/config.toml
sudo sed -i 's/SystemdCgroup \= false/SystemdCgroup \= true/g' /etc/containerd/config.toml
sudo sed -i "s|sandbox = 'registry.k8s.io/pause:3.10.1'|sandbox = 'registry.k8s.io/pause:3.10'|g" /etc/containerd/config.toml
sudo sed -i "s|config_path = '/etc/containerd/certs.d:/etc/docker/certs.d'|config_path = '/etc/containerd/certs.d'|g" /etc/containerd/config.toml
sudo mkdir -p /etc/containerd/certs.d/my-docker-registry.com:5000

#create the host.toml file#
cat <<EOF | sudo tee /etc/containerd/certs.d/my-docker-registry.com:5000/hosts.toml
server = "http://my-docker-registry.com:5000"

[host."http://my-docker-registry.com:5000"]
  capabilities = ["pull", "resolve"]
  skip_verify = true
EOF

sudo systemctl restart containerd
sudo usermod -aG docker $USER
newgrp docker
Configure Insecure Registries
sudo tee /etc/docker/daemon.json <<EOF
{
  "insecure-registries": ["my-docker-registry.com:5000"]
}
EOF
sudo systemctl restart docker
Verify connectivity to the private registry on the online server.
curl my-docker-registry.com:5000/v2/_catalogInstall Kubernetes
cd /lumenvox/k8s-offline/
sudo dnf install *.rpm --disablerepo=* --skip-broken
sudo systemctl enable --now kubelet
sudo systemctl enable --now containerd
Load Kubernetes images onto the offline server.
cd /lumenvox/k8s-images
sudo ctr -n k8s.io images import coredns:v1.11.3.tar
sudo ctr -n k8s.io images import etcd:3.5.24-0.tar
sudo ctr -n k8s.io images import kube-apiserver:v1.31.14.tar
sudo ctr -n k8s.io images import kube-controller-manager:v1.31.14.tar
sudo ctr -n k8s.io images import kube-proxy:v1.31.14.tar
sudo ctr -n k8s.io images import kube-scheduler:v1.31.14.tar
sudo ctr -n k8s.io images import pause:3.10.tar
Initialize the Control Plane
Replace the IP address with the actual IP of the offline server.
sudo kubeadm init --apiserver-advertise-address=172.18.2.76 --kubernetes-version=v1.31.14
This may take up to 5 minutes. Once complete, configure kubectl for the current user.
mkdir -p $HOME/.kube
sudo cp /etc/kubernetes/admin.conf $HOME/.kube/config
sudo chown $(id -u):$(id -g) $HOME/.kube/config
Untaint the node to allow workloads to run on the control plane. Replace <node-name> with the actual node name.
kubectl get node
kubectl taint node <node-name> node-role.kubernetes.io/control-plane-
Note: A NotReady status is expected at this stage. The node will become Ready after the Calico network plugin is installed in the next step.
Install Calico
cd /lumenvox/calico-offline
sudo ctr -n k8s.io images import kube-controllers:v3.27.0.tar
sudo ctr -n k8s.io images import node:v3.27.0.tar
sudo ctr -n k8s.io images import cni:v3.27.0.tar
kubectl apply -f calico.yaml
The node should now show Ready status.
Install Crictl
cd /lumenvox/crictl-offline
sudo tar zxvf crictl-v1.31.0-linux-amd64.tar.gz -C /usr/local/bin
sudo chmod +x /usr/local/bin/crictl
Install Linkerd
cd /lumenvox/linkerd-offline
sudo chmod +x linkerd_cli_installer_offline.sh
sudo ctr -n k8s.io images import controller:edge-24.8.2.tar
sudo ctr -n k8s.io images import metrics-api:edge-24.8.2.tar
sudo ctr -n k8s.io images import policy-controller:edge-24.8.2.tar
sudo ctr -n k8s.io images import prometheus:v2.48.1.tar
sudo ctr -n k8s.io images import proxy:edge-24.8.2.tar
sudo ctr -n k8s.io images import proxy-init:v2.4.1.tar
sudo ctr -n k8s.io images import tap:edge-24.8.2.tar
sudo ctr -n k8s.io images import web:edge-24.8.2.tar
./linkerd_cli_installer_offline.sh
export PATH=$PATH:~/.linkerd2/bin
linkerd check --pre
linkerd install --crds | kubectl apply -f -
linkerd install | kubectl apply -f -
linkerd check
linkerd viz install | kubectl apply -f -
kubectl delete cronjob linkerd-heartbeat -n linkerd
Install Helm
cd /lumenvox/helm-offline
tar -zxvf helm-v3.19.2-linux-amd64.tar.gz
sudo mv linux-amd64/helm /usr/local/bin/helm
Deploy External Services
Create the namespace.
kubectl create ns lumenvoxEdit the docker-compose.yaml to pull images from the private registry.
cp -r /lumenvox/services-offline/external-services/ ~
cd ~/external-services
vi docker-compose.yaml
Set the following image references:
- MongoDB:
my-docker-registry.com:5000/mongo:8.0.17 - PostgreSQL:
my-docker-registry.com:5000/postgres:17.4-alpine3.21 - RabbitMQ:
my-docker-registry.com:5000/rabbitmq:4.1.1 - Redis:
my-docker-registry.com:5000/redis:8.0.3
Edit the .env file with your passwords.
vi .env

#-------------------------#
# MongoDB Configuration
#-------------------------#
MONGO_INITDB_ROOT_USERNAME=lvuser
MONGO_INITDB_ROOT_PASSWORD=mongo1234

#-------------------------#
# PostgreSQL Configuration
#-------------------------#
POSTGRES_USER=lvuser
POSTGRES_PASSWORD=postgres1234

#-------------------------#
# RabbitMQ Configuration
#-------------------------#
RABBITMQ_USERNAME=lvuser
RABBITMQ_PASSWORD=rabbit1234

#-------------------------#
# Redis Configuration
#-------------------------#
REDIS_PASSWORD=redis1234

#-------------------------#
# Restart Configuration
#-------------------------#
RESTART_POLICY=always
Important: The passwords above are examples. Always use strong, unique passwords in production environments.
Start the external services and verify they are running.
docker compose up -d
docker ps
Create the Kubernetes secrets. Replace the password variables with the values set in the .env file.
kubectl create secret generic mongodb-existing-secret --from-literal=mongodb-root-password=$MONGO_INITDB_ROOT_PASSWORD -n lumenvox
kubectl create secret generic postgres-existing-secret --from-literal=postgresql-password=$POSTGRES_PASSWORD -n lumenvox
kubectl create secret generic rabbitmq-existing-secret --from-literal=rabbitmq-password=$RABBITMQ_PASSWORD -n lumenvox
kubectl create secret generic redis-existing-secret --from-literal=redis-password=$REDIS_PASSWORD -n lumenvox
Edit values.yaml with the clusterGUID, IP address of the external services, ASR language(s), and TTS voice(s) to install.
cd /lumenvox
vi values.yamlSet Up TLS Certificate
Generate a self-signed TLS certificate. Ensure the Subject Alternative Names match the hostnameSuffix in your values.yaml. Replace the hostnames below with your environment values.
openssl genrsa -out server.key 2048

openssl req -new -x509 -sha256 -key server.key -out server.crt -days 3650 \
  -addext "subjectAltName = DNS:lumenvox-api.<hostnameSuffix>, \
  DNS:biometric-api.<hostnameSuffix>, \
  DNS:management-api.<hostnameSuffix>, \
  DNS:reporting-api.<hostnameSuffix>, \
  DNS:admin-portal.<hostnameSuffix>, \
  DNS:deployment-portal.<hostnameSuffix>"

cd /lumenvox
kubectl create secret tls speech-tls-secret --key server.key --cert server.crt -n lumenvox
Install the Platform
cd /lumenvox
helm install lumenvox helm-offline/lumenvox -n lumenvox -f values.yaml
watch kubectl get po -A
Wait for resource pods to come online. The itn-en, asr-en, and neural-tts-en-us pods will initially fail because model files have not yet been loaded.
Load Model Files
Reinstall the Helm chart to trigger the persistent volume directory setup job.
helm uninstall lumenvox -n lumenvox
helm install lumenvox helm-offline/lumenvox -n lumenvox -f values.yaml
Copy the manifest and model files to the persistent volume.
cd /lumenvox/lv_models-offline
cp -p *.manifest /data/lang/manifests/
cp -p *.tar.gz /data/lang/downloads/
Restart all deployments to pick up the model files.
kubectl rollout restart deployment -n lumenvoxAll pods should now be running.
Install Ingress-nginx
Configure the ingress-nginx Helm chart to pull images from the private Docker registry.
cd /lumenvox/ingress-nginx-offline
vi ingress-nginx/values.yaml
Search for controller in the file and set the following values:
image: "controller"repository: "my-docker-registry.com:5000/controller"tag: "v1.12.4"digest: nulldigestChroot: nullSearch for kube-webhook and set:image: kube-webhook-certgenrepository: "my-docker-registry.com:5000/kube-webhook-certgen"tag: v1.5.2digest: null
Search for hostNetwork and set it to true.
helm upgrade --install ingress-nginx ./ingress-nginx \
  -n ingress-nginx \
  --create-namespace \
  --set controller.hostNetwork=true \
  --version 4.12.1 \
-f ./ingress-nginx/values.yaml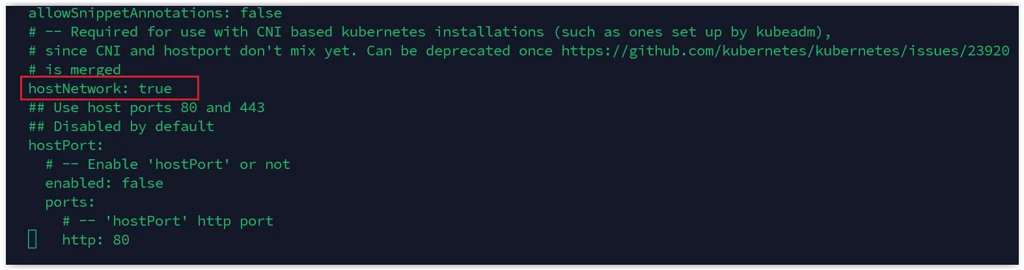 Install MRCP-API
Copy the MRCP-API to the home directory and configure Docker to pull from the private registry.
cd /lumenvox/services-offline/
cp -r mrcp-api ~
cd ~/mrcp-api/docker/
vi .env
Set DOCKER_REGISTRY=my-docker-registry.com:5000/ in the .env file.
docker compose up -dCopy the TLS certificate to the MRCP-API.
cd ~/mrcp-api/docker
docker compose down
sudo cp /lumenvox/server.crt certs
docker compose up -d
Install MRCP-Client
Copy the MRCP-Client to the home directory and configure Docker to pull from the private registry.
cd /lumenvox/services-offline/
cp -r mrcp-client ~
cd ~/mrcp-client
vi docker-compose.yml
Set the image to my-docker-registry.com:5000/simple_mrcp_client.
docker compose up -dCreate a Deployment
Follow the Access the Admin Portal to Create a Deployment section in the Setup via Quick Start (kubeadm) guide to complete the deployment setup.
Licensing the Server
For air-gapped environments, use the license reporter tool to register your server. See Setting up the License Reporter Tool for instructions.
http://privatecloud.capacity.com/article/778411